


Inserting, viewing, and saving a streaming file in Word
Be aware of the following restrictions when using streaming files in Word:
- Streaming files work with 32-bit Microsoft Word, but not 64-bit Microsoft Word. This is because the streaming files control is 32-bit.
- You cannot embed a streaming file in Word. Therefore, if you want to open the Word document on another computer you must also copy the .hsf to that computer, and store the .hsf file in the same folder from which you inserted it.
- Before you insert a streaming file in Word, you must view the streaming file in Internet Explorer once. When you view the streaming file in Internet Explorer, you download the GEOVIA Stream Control to your computer. Without the GEOVIA Stream Control, you cannot insert a streaming file in Microsoft Word.
 Tip: GEOVIA recommends that you store the .hsf files in, and insert the .hsf files from, a location with a short file path in a drive in which other users are likely to have write access on their computers. For example, you could save the .hsf files in C:\temp or C:\stream.
Task: Insert a streaming file in Word 2003
-
Open a new or existing Word document.
- Position the cursor where you want to insert the file.
- Choose Insert > Object.
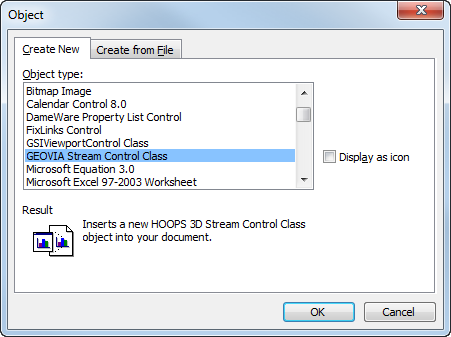
- Select GEOVIA Stream Control Class, and click OK.
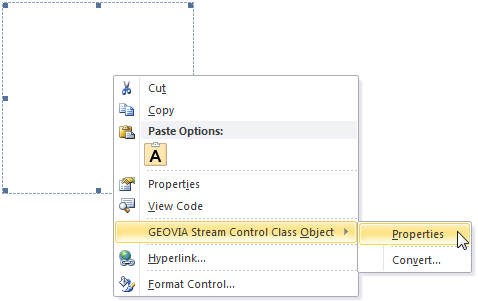
- Right-click on the draw box, and select GEOVIA Stream Control Class Object > Properties.
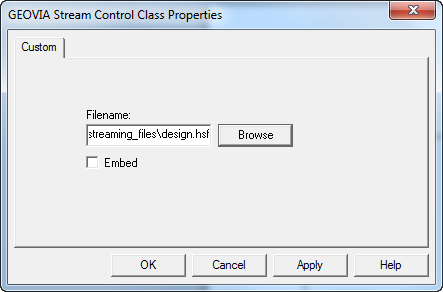
- Browse to the design.hsf file, and click Open.
- Click OK.
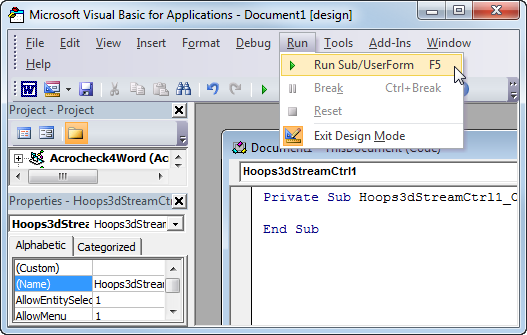
- Choose Run > Run Sub/UserForm, or press F5.
- Close the Visual Basic window.
The Object form is displayed.
The draw box is inserted into the document.
The GEOVIA Stream Control Class Properties form opens.
 Note: The Microsoft Visual Basic window opens automatically.
The design.hsf file is displayed in the Word document.
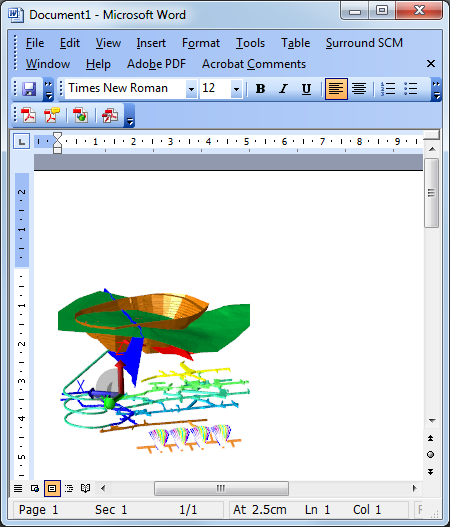
Task: Insert a streaming file in Word 2007
- Open a new or existing Word document.
- Position the cursor where you want to insert the file.
- Click the Office
 button,
and then click Word Options.
button,
and then click Word Options. - Click Trust Center.
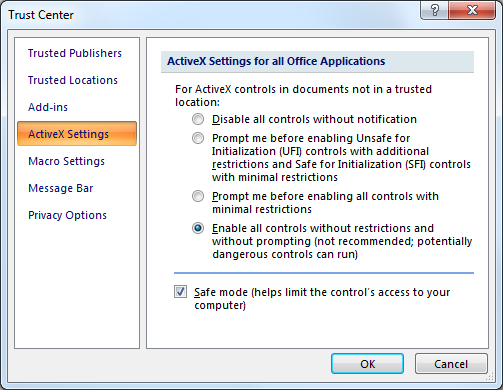
- Click Trust Center Settings, and click ActiveX Settings.
- Complete the form as shown, and click OK.
- Click OK.
- Click the Office button, and click
Word Options.
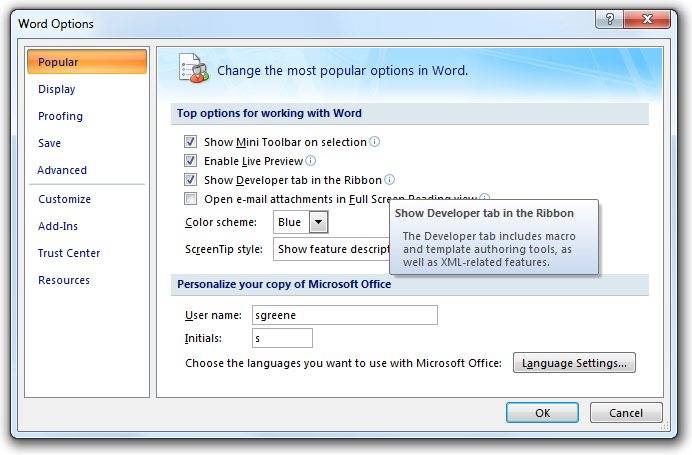
- In the Word Options form, click Popular.
- Select Show Developer tab in the Ribbon, and click OK.
- Click the Developer tab.
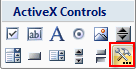
- In the Controls group, click Legacy
Tools
 , and click More Controls.
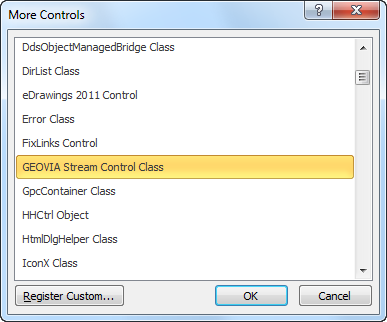
 - On the More Controls form, select GEOVIA Stream Control Class, and click OK.
- Click on the draw box, right-click and choose GEOVIA Stream Control Class Object > Properties.
- Browse for design.hsf, and click Open.
- Click OK.
- Choose Run > Run Sub/UserForm, or press F5.
- Close the Visual Basic window.
Note: A draw box is displayed in your Word document.
Note: If you might use this Word document on another computer, you would copy the .hsf file to a short path on C: drive such as C:\temp or C:\stream before opening it. To view the streaming file correctly on the other computer you must also copy the .hsf file to the same short path from which you inserted the .hsf file.
Note: The Microsoft Visual Basic window opens automatically.
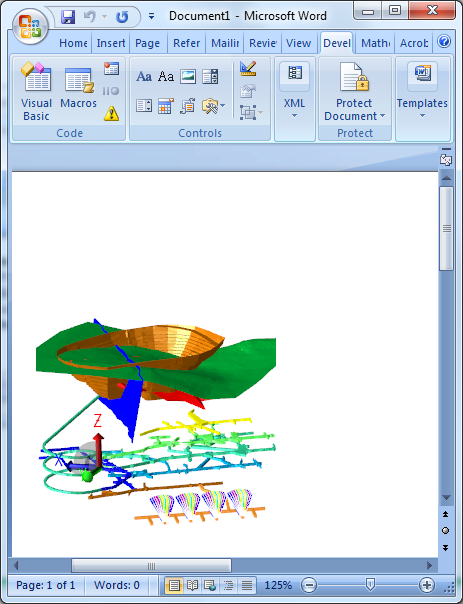
The design.hsf file is displayed in the Word document.
Task: Insert a streaming file in Word 2010 or Word 2013
- Open a new or existing Word document.
- Position the cursor where you want to insert the file.
- Choose File > Options.
- Click Trust Center.
- Click Trust Center Settings, and click ActiveX Settings.
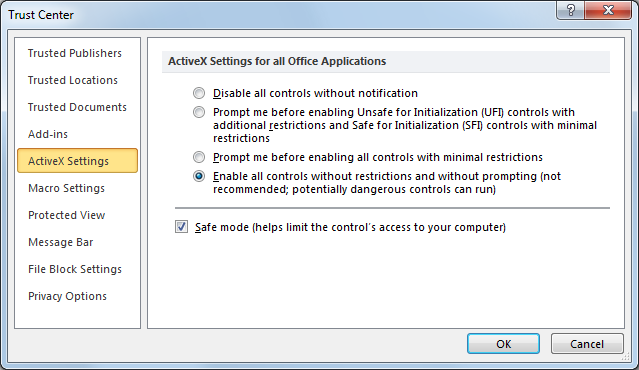
- Complete the form as shown, and click OK.
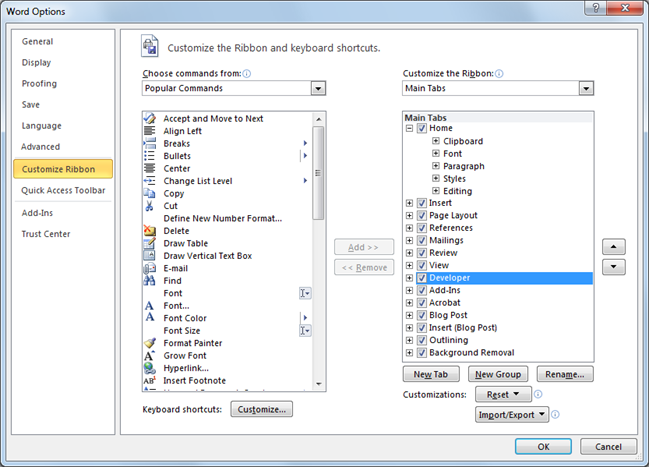
- Click Customize Ribbon.
- In the Main Tabs list, select the Developer check box, and click OK.
- Click the Developer tab.
- In the Controls group, click Legacy
Tools, and then click More Controls.
- On the More Controls form, select GEOVIA Stream Control Class, and click OK.
- Click on the draw box, right-click and choose GEOVIA Stream Control Class Object > Properties.
- Browse for design.hsf and click Open.
- Click OK.
- Choose Run > Run Sub/UserForm, or press F5.
- Close the Visual Basic window.
Note: A draw box is displayed in your Word document.
Note: If you might use this Word document on another computer, you would copy the .hsf file to a short path on C: drive such as C:\temp or C:\stream before opening it. To view the streaming file correctly on the other computer you must also copy the .hsf file to the same short path from which you inserted the .hsf file.
Note: The Microsoft Visual Basic window opens automatically.
The design.hsf file is displayed in the Word document.
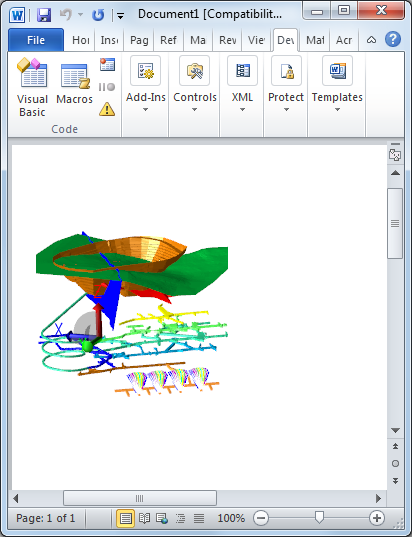
Task: View a streaming file in Word
You can view a streaming file in 32-bit versions of Word 2003 or later versions.
Before you attempt the following procedure on any computer, you must view the streaming file in Internet Explorer once. When you view the streaming file in Internet Explorer, you download the GEOVIA Stream Control to your computer. Without the GEOVIA Stream Control, you cannot view a streaming file in Microsoft Word.
- Right-click anywhere on the image to open the shortcut menu.
- Select Zoom to Window, and then click and drag in the viewport to zoom the data.
- Select Orbit , and then click and drag in the viewport to rotate the data.
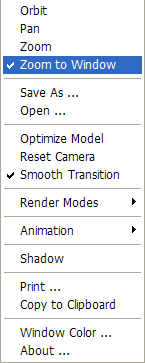
Tip: To zoom out, click Reset Camera.
Task: Save a streaming file in Word
- Select the Save As command:
- In Word 2003, 2010, or 2013 choose File > Save As.
- In Word 2007 click the Office button, and select Save As > Word Document.
- Navigate to the directory you want to save the file in and type the file name.
- Click Save.
- If you send the Word document to another computer, also send the .hsf file, and save the .hsf file in the same folder from which you inserted the .hsf file.
Note: You can save the document in .docx format. You do not have to save the Word document in .docm format. The only exception to this is if you have Word 2003 (which does not support the .docx format, but does allow you to save as .doc or as .docm) you must save in .docm format.