


Advanced interface operations
Menu bars, menus, and commands
If you do not understand the meaning of the terms menu bar, menu, and command, you could easily become confused when you try to create a customised menu bar.
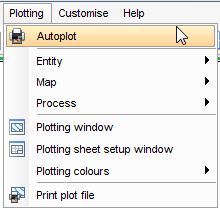
The following image shows the Main menu bar.

Each menu contains commands (or menu items). The commands are located on the menu or on a submenu. For example, the Plotting menu contains the Autoplot, Plotting window, Plotting sheet setup window, and Print plot file commands, and it also contains the Entity, Map, Process, and Plotting colours submenus. Each submenu contains more commands.
Displaying and customising menu bars
You can activate most Surpac functions using the menu system.
A black triangle  on the right side of a menu item indicates that you can select it to display a submenu.
To see the list of menu bars and toolbars you can view, right-click in empty space on the menu bar or in the toolbar region.
The following image indicates that the Blast design and the Main Menu menu bars are displayed.
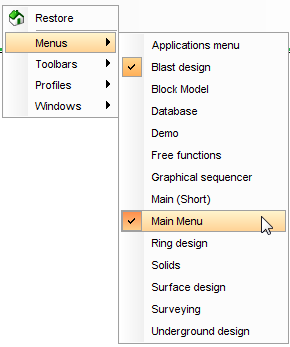
Click a menu bar to switch between displaying and hiding it.
You can also create your own customised menu bars or toolbars to group together the functions that you use frequently, or to group together all the functions that you need to use to do a specific task.
Task: Create a customised menu bar
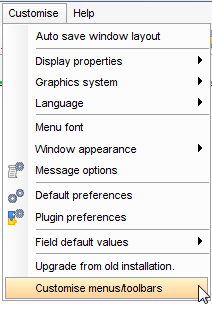
- Choose Customise > Customise menus/toolbars.
- To create a new menu bar, in User Menus/Toolbars, click Menubars, and click New.
- To rename the menu bar:
- Click MenuBar_1.
- Click Edit.
- Type pit_design and press ENTER.
- Select the menus to place in the menu bar:
- In Surpac Menus/Toolbars, expand Menubars, and then expand the Surface design menu bar.
- Hold the CTRL key, and select the Pit Design, Expand segment, and Expand string folders.
- Click Copy.
- Select the new pit_design menu bar.
- Click Paste.
- In theSave Profile As box, type pit_design.
- Click Apply.
- Drag the pit_design menu bar to a location where there is some space at the top of the Surpac window.
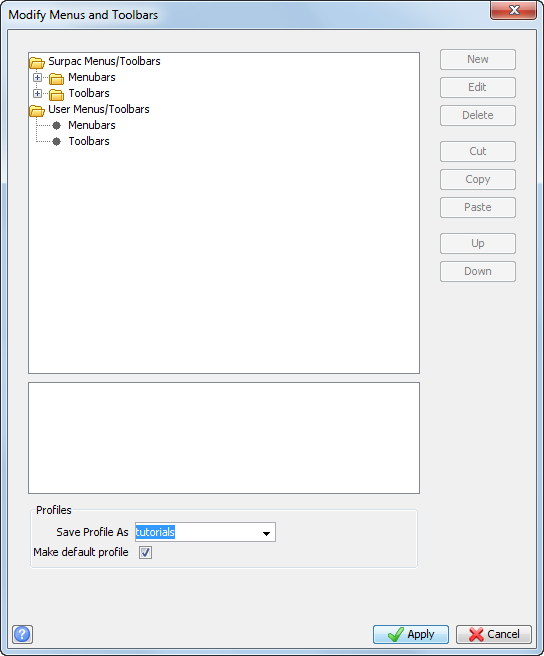
The Modify Menus and Toolbars form is displayed.
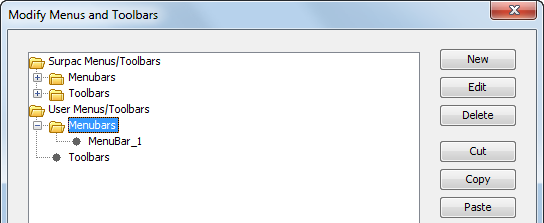
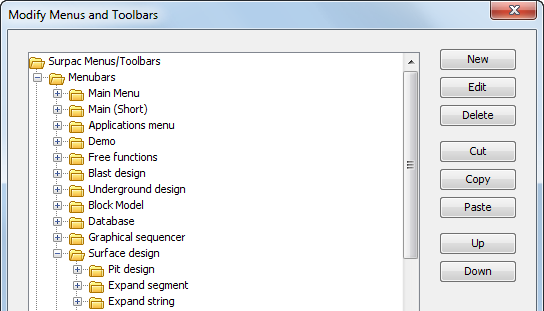


 Note: The new pit_design menu bar “floats” above the Surpac window.

Customising toolbars and buttons
Task: Display toolbars and create a customised toolbar
You might find that you only are using only a small number of the digitising functions, for example, Start new string, Start new segment, Digitise New Point at Mouse Location, New midpoint, and Close current segment.
You could create a toolbar that has only the functions that you need by taking a copy of the Digitise toolbar, removing the functions you don't use and adding the New midpoint function.
- Right-click in the empty space in the menu bar or toolbar region.
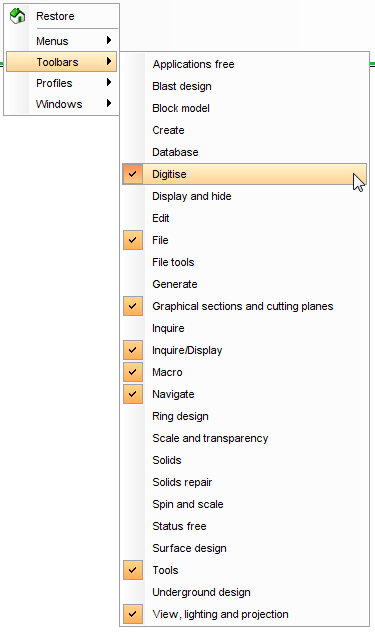
- Select Toolbars to see which toolbars are currently displayed.
- Choose Customise > Customise menus/toolbars.
- In User Menus/Toolbars, click Toolbars, and click New.
- Click Toolbar1 and clickEdit.
- Type pit_design and press ENTER.
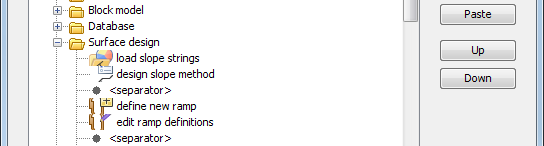
- In Surpac Menus/Toolbars, expand Menubars, and then expand the Surface design toolbar.
- Hold the CTRL key, and select several of the surface design commands as shown.
- Click Copy.
- Select the new pit_design toolbar, and click Paste.
This creates a new menu, called Toolbar1.
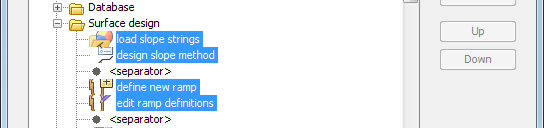

Task: Creating a custom button to put on a toolbar
- Choose Customise > Customise menus/toolbars.
- In the Modify Menus and Toolbars form, select the pit_design toolbar and click New.
- Enter the information as shown, and click Apply.
- Click Apply.
- Right-click in an empty area near the toolbars.
- From the Toolbars menu, select pit_design.
- Drag the pit_design toolbar to a location where you can clearly see it.
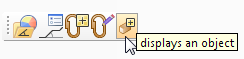
- To see the tool tip description for an icon on a toolbar, hover the cursor over the icon.
This creates a new button on the Pit design toolbar.
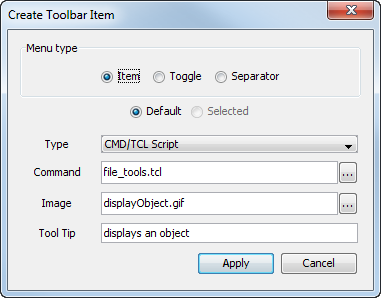
Note: To fill in the Command box, you have to click the Ellipsis button and navigate to a TCL file. Similarly, to fill in the Image
box, you must click the Ellipsis button and navigate to an icon file in the icons folder.
button and navigate to a TCL file. Similarly, to fill in the Image
box, you must click the Ellipsis button and navigate to an icon file in the icons folder.
Note: If you have installed Surpac in the default directory, the full path to the TCL command scripts folder is:
C:/Users/Public/GEOVIA/Surpac/66/share/resource/scripts/toolbars/
Using and creating profiles
A profile is a set of menus and toolbars grouped together into modules. The profiles are available by right-clicking in the empty space and selecting from the available profiles.
Task: Select the geology_database profile
- Right-click in the empty space at the top of the Surpac interface.
- Select Profiles > geology_database.
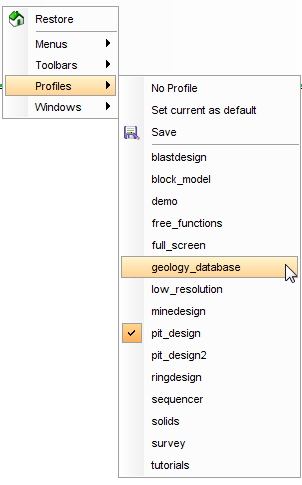
The menus and toolbars in the geology_database profile are displayed.

The interface now contains a new set of menus and toolbars that cover the functionality for processing data from a geological database.
Profiles allow you easy access to all of your customisations.
Task: Saving your customisations to a profile
If you are an experienced Surpac user, you might want to create your own profile to get faster access to the toolbars, menus, and commands that you need for your work.
- Make sure that Surpac is displaying the menu bars and toolbars that you use frequently, and that the menu bars and toolbars that you do not need are hidden.
- Right-click in the empty space at the top of the Surpac window.
- From the Profiles menu, click Save.
- Enter the information as shown, and click Apply.
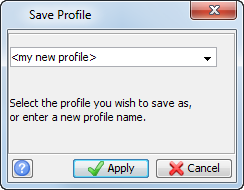
When you open Surpac again, you can choose the profile you just saved to reload your customised settings for menus, toolbars and buttons and automatically configure your workspace.
Task: Restoring the default profile
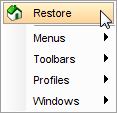
- Right-click the empty space beside the toolbars at the top of the Surpac window.
- Click Restore.
- Click Apply to restore to the default profile.
Using the Function Chooser
A quick way for you to run a function is to use the Function Chooser. You can type an “alias” into the Function Chooser to run a function. An alias is an abbreviation of the function name.
Task: Run two functions from the Function Chooser
- Open pit_design1.str in Graphics.
- Type CS (for Clear Screen) directly into the function chooser.
- Press ENTER.
- Type the alias PS (for Plot Strings) into the Function Chooser.
- Enter the information as shown, and click Apply.

Running the Clear Screen function makes the graphics viewport empty but, unlike the Reset graphics function, it leaves the data in the layer.
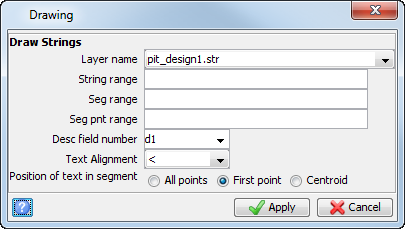
pit_design1.str is displayed in Graphics.
Note: You can find a complete list of aliases in the files SSI_ETC:short.ssi and SSI_ETC:Surpac.mst.
Working with forms
You control how a function works by entering parameters into a form. The terms form and dialog box mean the same thing.
The Open File form and its components is a typical form.
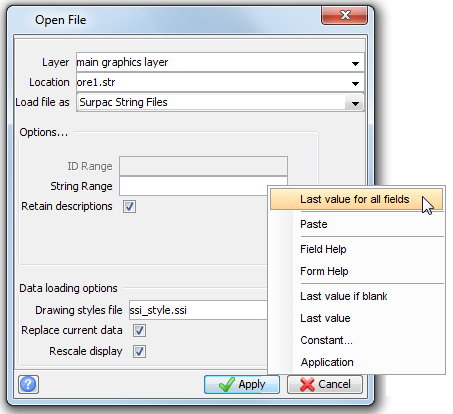
By clicking once to highlight a field on a form, and then right-clicking, you see options to help you fill in the form.
Last value if blank
Selecting this command causes the field to keep the last value you entered when the application does not supply a value. For example, if you select Last value if blank for the Layer field of the Open File form, the text in the Layer field does not change, but if you select Last value if blank for the Location field, the last file name used is shown.
Last value
Selecting this item causes the field to keep the last value regardless of the value that Surpac inserts. For example, if you select Last value in the Layer field of the Open File form, the Layer field displays the name of the layer that you used on the last occasion you used this form.
Constant...
Selecting this item allows you to enter a value to use for this field every time you use the form.
Application
Selecting this item causes the field to display the value supplied by Surpac. This is how Surpac worked in previous versions.
Configuring windows and panes in the interface
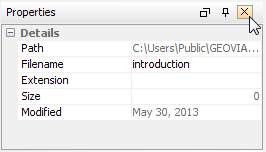
You can modify panes in the interface using the three buttons on the top right side of the pane:
- toggle floating
- toggle auto-hide
- close
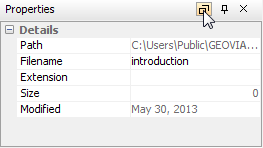
Toggle floating
The Toggle floating button aloows you to “dock” or “undock” the pane. When the pane is docked, it is fixed to an area of the Surpac window. When the pane is undocked, it floats so you can move it to any part of the Surpac window. You can also dock the pane by moving it to one of the edges of the screen, or to an existing pane. To restore the pane to its original position, click again on the Toggle floating button or right-click on the top part of the pane and click Floating.
Toggle auto-hide
The Toggle auto-hide button enables you to hide the pane so that you have more workspace for other panes.
When you click Toggle auto-hide, the pane is minimised and attached to the side of the Surpac window. The following image shows the Properties pane attached to the side of the Surpac window.
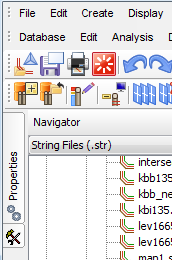
To show the pane when it is minimised, move the cursor over the minimised pane. To restore the pane to its original position, click Toggle auto-hide again.
Close
To close a pane, click the X button in the top right corner.
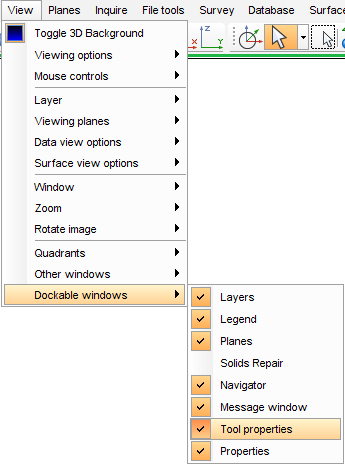
To restore a pane that you have closed, select View > Dockable windows, and click the pane that you want to restore.
In the example below, the Tool properties pane was closed, so it is not selected as a dockable window. By clicking on Tool properties, you can restore the pane to its original position.
To restore the whole interface to its default state, right-click an empty area in the toolbar region, and click Restore.