


Creating a Surpac geological database
Creating a new database
Task: Create a database
- Choose Database > Open/New.
- Enter the information as shown, and click Apply.
- Click Apply.
- Enter the information as shown, and click Apply.
- Enter the information as shown, and click Apply.
- Click the assay tab, and enter the information as shown.
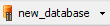
- Click the geology tab, enter the information as shown, and then click Apply.
- new_database.accdb The Microsoft Access database which contains the data.
- new_database.ddb The file that Surpac requires to connect to the database.
- Choose Database > Close.
- In the Navigator, right-click new_database.ddb, and select Edit.
- the type and name of database
- where the database is located (that is, a path location)
- table names, field names, and formatting of each field type
- Close the text editor.
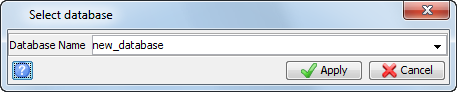
The Create definition for new database form appears, showing the name and location of the new database.
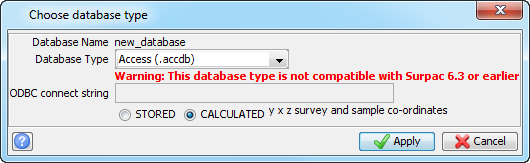
An empty database with only mandatory fields in the tables Collar, Survey, and Translation is created. You can also create optional tables for sample and geology data.
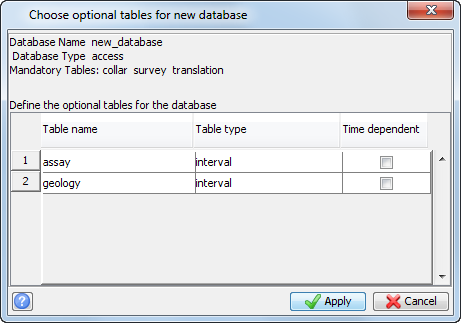
 Note: To
create a new row, right-click the row number, and click Add.
Note: To
create a new row, right-click the row number, and click Add.
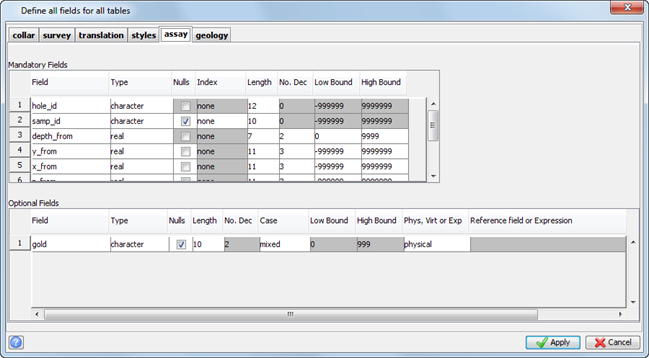
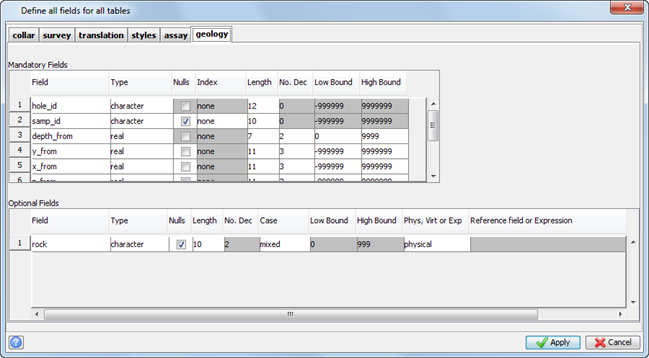
The database is created. The database name appears on the status bar to indicate that you are connected to it.
Two files have been created:
The file is opened in your default text editor.
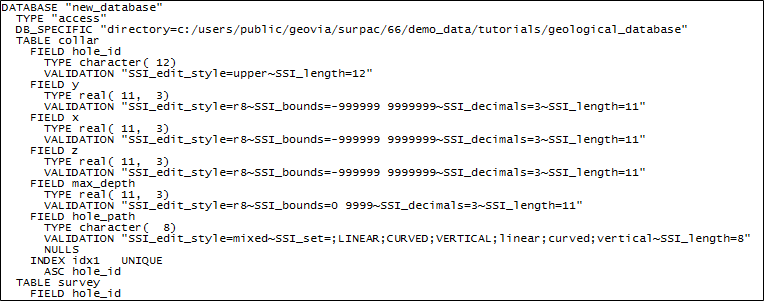
Note: The value for DB_SPECIFIC can be any folder on your local drive or on a network drive.
The database definition file (.ddb) contains:
The .ddb file is a text file and contains no data. It allows Surpac to connect to a relational database and usually has the same name as the database.
Note: To see all of the steps in this task, run
01_create_new_database.tcl . You
need to Apply any forms presented.
Connecting to an existing database
You can connect to an existing database that was not created in Surpac. This process is called mapping a database.
The DB MAPPER function creates links between tables and fields in the existing database and the database structure in Surpac. This function also allows you to define a view of your database by specifying which tables and fields you want to use in Surpac. This is useful if you have a very large database and you only need to use information from a few tables.
Task: Connect to an existing database
- Choose Database > Map the database.
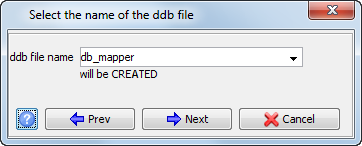
- Enter the information as shown, and click Next.
- Enter the information as shown, and click Next.
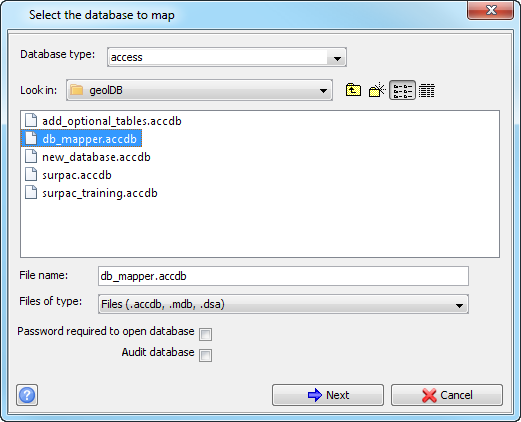
A progress bar appears.
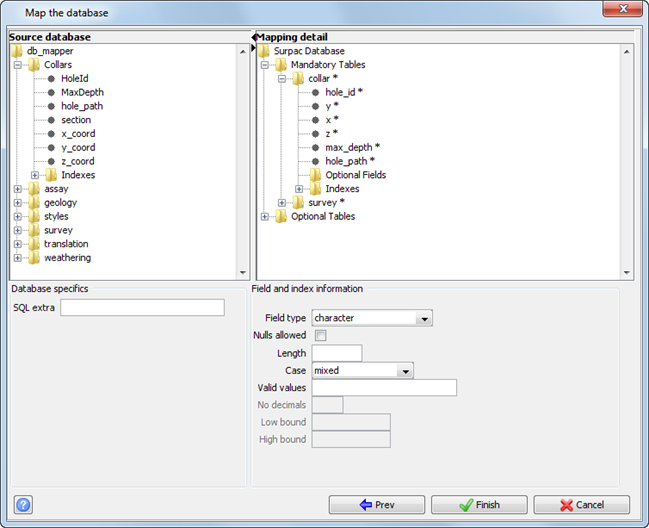
The Map the database form is displayed.
Task: Map tables from the exiting to the new database
The Map the database form is split into two sections. The left-hand side, the Source database, shows all tables and queries contained in the database. The right-hand side, the Mapping detail, shows the tables and field names required for connecting Surpac to your database.
The mapping detail pane on the right-hand side of the form shows two folders labelled Mandatory Tables and Optional Tables.
Under the Optional Tables folder there are five folders.
The first folder represents the translation table that is required for translating numeric codes, such as below detection assays from the lab. This folder contains the mandatory fields for the translation table and folders for any optional fields and indexes.
The styles table stores the drawing styles created for drillhole geology codes and assay values that are stored in the database. When connecting to an existing database, you need to create the styles before you can display coloured values for the drillholes.
The Interval Tables, Point Tables, and Discrete Tables folders are used to specify which optional tables you want to include in your database.
If the existing database uses the same table names and field name conventions as a database created using Surpac, then the collar, survey, interval, and point tables are mapped automatically.
Note: These items are case-sensitive.
If other naming conventions have been used, including upper or mixed case, then each table must be mapped. Table names or field names that have not been recognised by running the DB MAPPER function are highlighted with an asterisk (*).
Note: Table names or fields names that have an asterisk (*) next to their name must be mapped.
To connect the database tables:
- Click the + to expand the survey and collar folders.
- Expand the Options Tables folder.
- Map the collar and survey tables:
- Drag and drop the Collars table from the left-hand side to the top of the collar table on the right-hand side.
- Drag and drop the HoleId field from the left-hand side to the top of the hole_id field on the right-hand side.
- Drag and drop the MaxDepth field from the left-hand side to the top of the max_depth field on the right-hand side.
- Repeat this process to map each of the remaining mandatory fields (y, x, and z).
- Drag and drop the survey table from the left-hand side to the top of the survey table on the right-hand side.
- Repeat steps 3 and 4 to map each of the remaining mandatory fields for the survey table.
- Under Collar > Optional Fields, right-click on the section field, and select Rename.
- Rename the section field to my_section.
- Map the geology table.
- Drag and drop the geology folder on the left to the Interval tables folder on the right and map the mandatory fields.
- In the geology table, under Optional Fields, rename the rock field to lithology.
- Click Finish.
- Choose Database > Close.
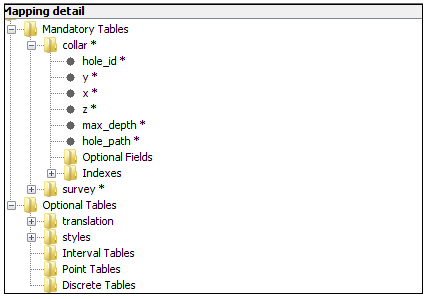
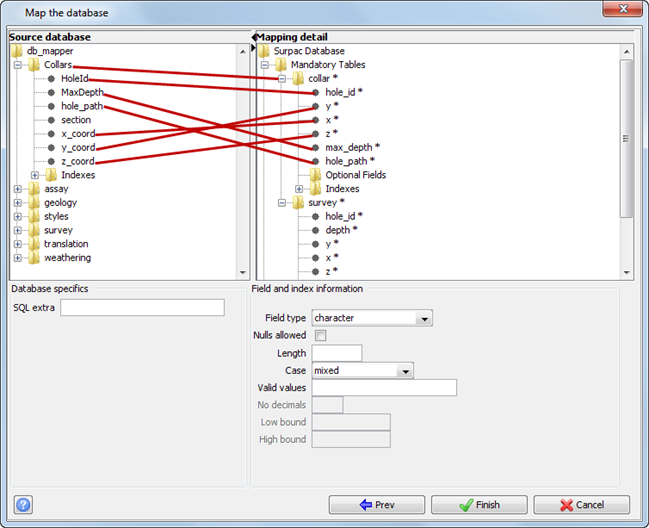
The hole_path field does not have to be mapped. If the external database does not have this field, Surpac uses the CURVED algorithm for all holes. Fields that are not mapped to the mandatory fields are placed in the Optional Fields folder.
 Tip: If you have mapped a Surpac table or field with an incorrect entry in your database, you can remove the mapping by selecting the Surpac table/field name and right-clicking the field. A shortcut menu appears with the options to Remove or Rename.
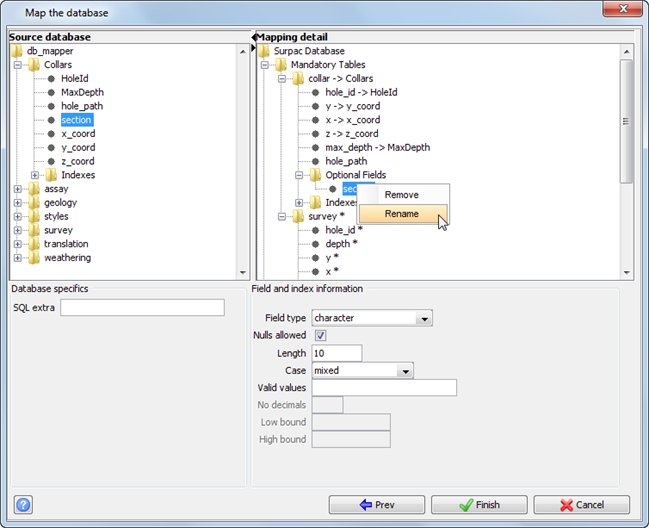
Note: This is only a label for the field and does not change the actual field name in your Access database.
The interval, point, and discrete tables allow you to map tables such as sample, geology, weathering, and geochem.
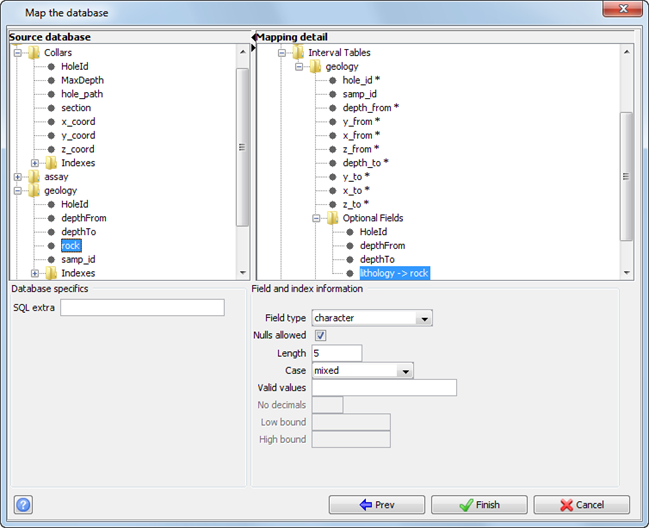
The geology folder contains all the mandatory Surpac fields and a folder to add in optional fields and indexes.
Note: For an interval table, the field
samp_id is specified as a mandatory field. However you
do not need to map this field if your interval table is a geology table. All fields with an asterisk (*) next to their name must be mapped.
After you have finished mapping your database, a .ddb file is produced which Surpac can use to connect to the database. If you rename or change the configuration of your database, you can use the DB MAPPER function to update the new changes.