


Estimation or filling the block model
Assign Value
Task: Fill the block model using Assign Value
- Open training2.mdl.
- Choose Estimation > Assign value.
- Enter the information as shown, and click Apply.
- Enter the information as shown, and click Apply.
- Click Yes, to write the assigned value to the block model.
- Choose Estimation > Assign value.
- Enter the information as shown, and click Apply.
- Enter the information as shown, and click Apply.
- Click Yes on the confirmation form.
- Choose Estimation > Assign value.
- Enter the information as shown, and click Apply.
- Enter the information as shown, and click Apply.
- Click Yes on the confirmation form.
- Choose Constraints > New constraints file.
- Enter the information as shown, and click Apply.
- Choose Display > Display block model, and click Apply.
- Open litho.con in Graphics.
- Choose Display > Colour model by attribute.
- Enter the values as shown, click Refresh,, and click Apply.
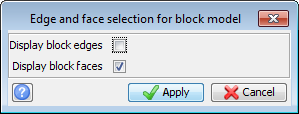
- Choose Display > Edge and face visibility, clear Display block edges as shown, and then click Apply.
- Choose Block model > Close.
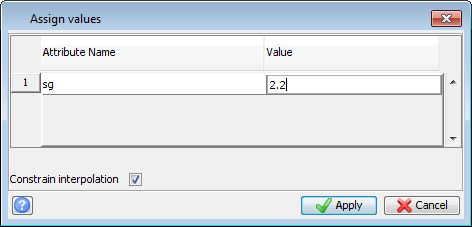
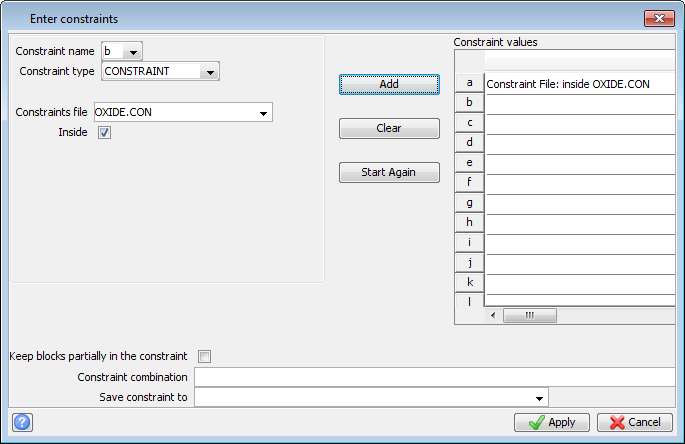
The Verify creation of file form appears.
You will now repeat this process of filling the attribute sg. You will assign sg a value of 2.6 inside trans.con and a value of 2.8 inside fresh.con.
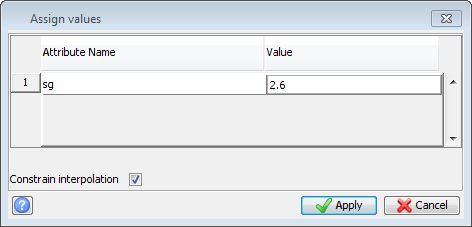
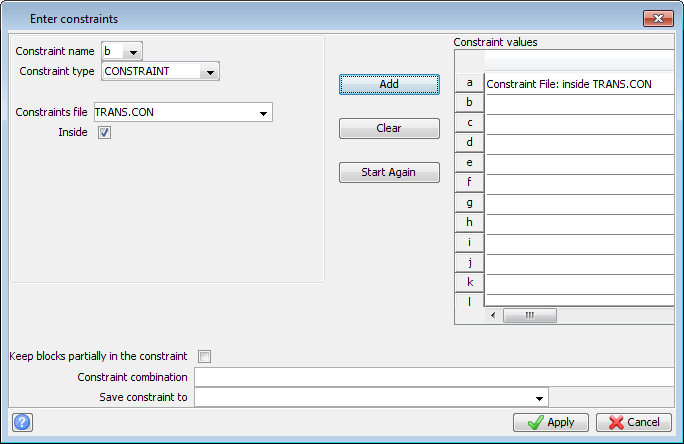
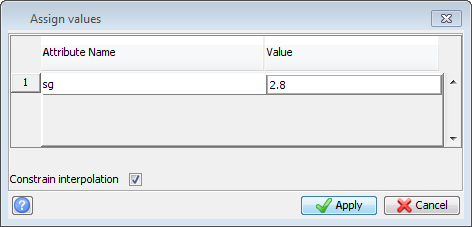
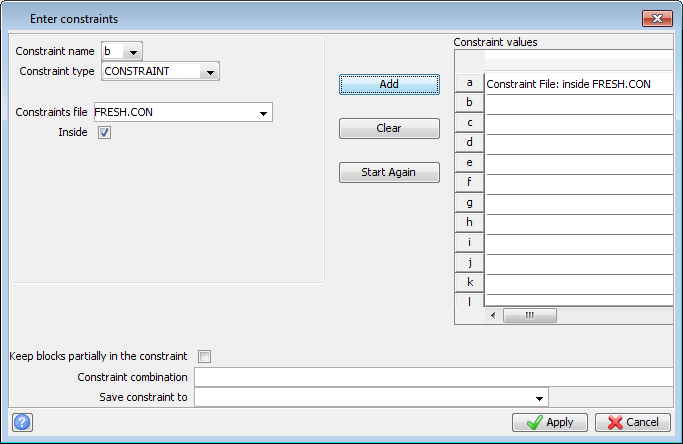
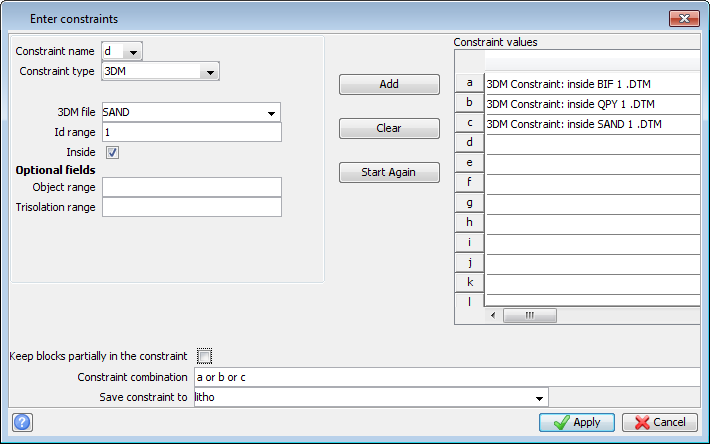
You will now create another constraint for viewing purposes. The file litho.con will contain all the blocks inside the solids sand1.dtm, bif1.dtm and qpy1.dtm.
 Note: Make sure you use the OR statement in the constraint combination box as shown.
You will now colour the blocks based on numerical attributes.
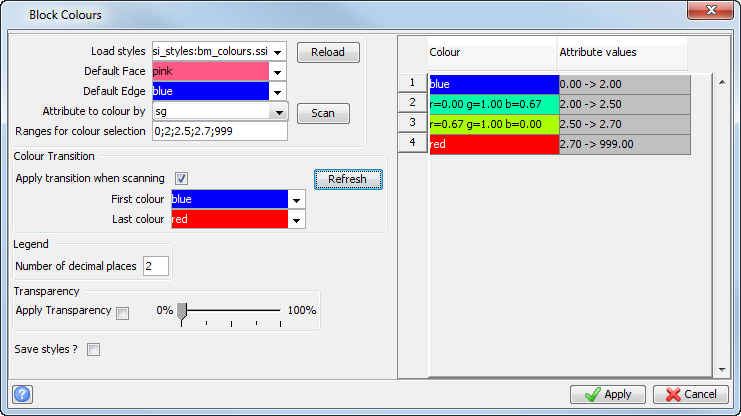
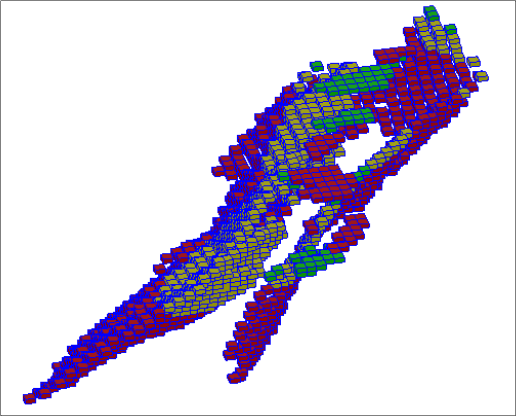
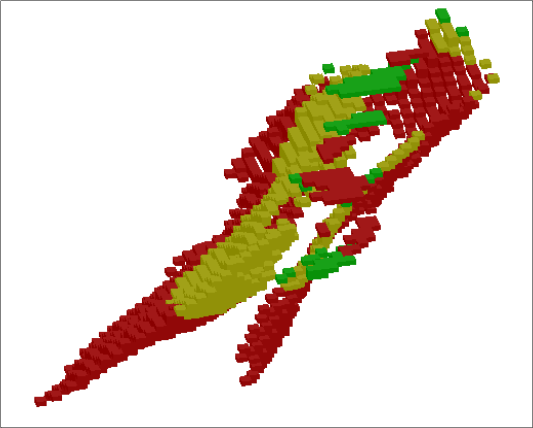
The visual effect is much better, as seen in the following image.
Note: To see all of the steps performed in this task, run _04_assign_value.tcl. You need to click Apply on any forms presented.
Nearest neighbour
Task: Fill the BIF zone using nearest neighbour
- Open training2.mdl.
- Choose Block Model > Display.
- Enter the information as shown, and click Apply.
- Choose Display > Edge and face visibility, select Display block edges as shown, and then click Apply.
- Choose View > Data view options > View by bearing & dip.
- Enter the information as shown, and click Apply.
- Choose View > Zoom > Out.
- Choose Constraints > New graphical constraint.
- Enter the information as shown, and click Apply.
- Choose Estimation > Nearest Neighbour.
- Enter the information as shown, and click Apply.
- Enter the information as shown, and click Apply.
- Enter the information as shown, and click Apply.
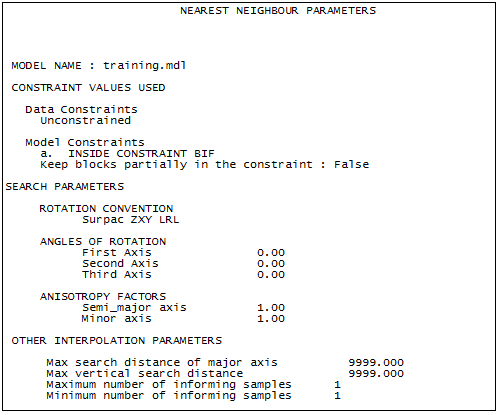
- Open nearest_neighbour.not.
- Choose Display > Colour model by attribute.
- Enter the information as shown, click Refresh, and click Apply.
- Choose Block Model > Save.
- Choose Block Model > Close.
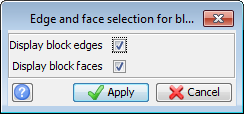
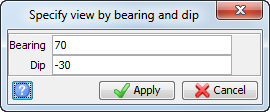
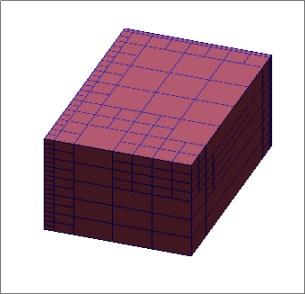
The block model is displayed.
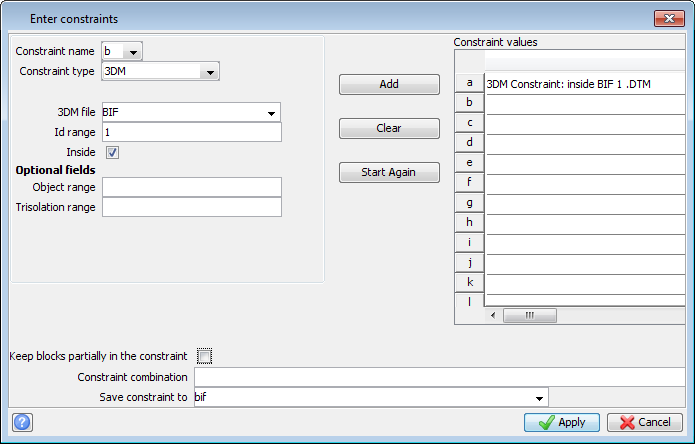
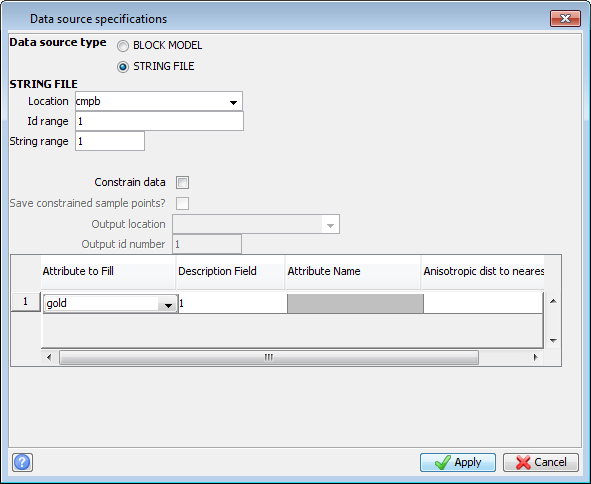
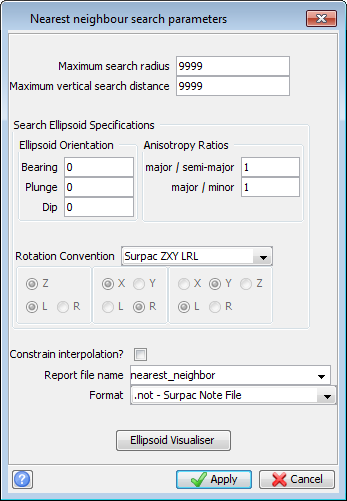
On the Status bar, you can see the progress of the estimation.

After the filling is completed, a report called nearest_neighbour.not is produced.
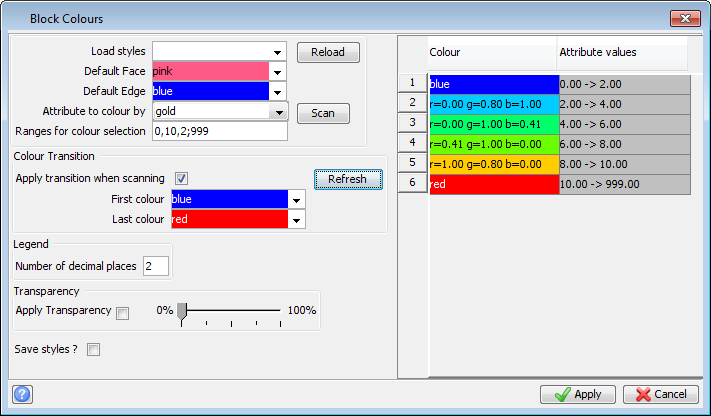
The constrained and coloured block model for the bif1 zone is displayed.
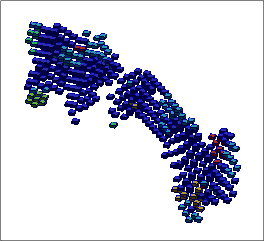
Note: To see all of the steps performed in this task, run _05a_nearest_neighbour.tcl. You need to click Apply on any forms presented.
Inverse distance
Task: Fill the sand zone using inverse distance
- Open training2.mdl.
- Choose Block Model > Display.
- Enter the information as shown, and click Apply.
- Choose View > Data view options > View by bearing and dip.
- Enter the information as shown, and click Apply.
- Choose View > Zoom > Out.
- Choose Constraints > New graphical constraint.
- Enter the information as shown, and click Apply.
- Choose Estimation > Inverse Distance.
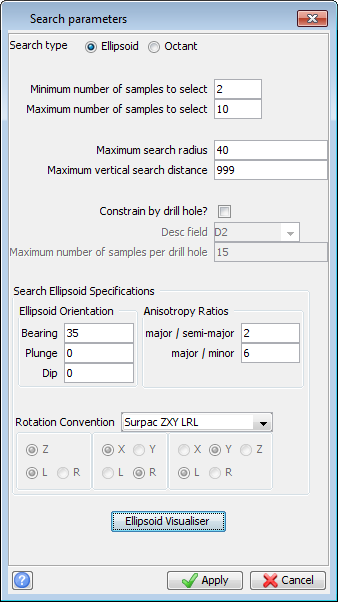
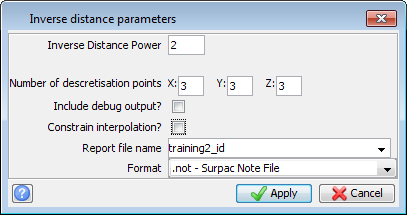
- Enter the information as shown, and click Apply.
- Enter the information as shown, and click Apply.
- Enter the information as shown, and click Apply.
- Enter the information as shown, and click Apply.
- Choose Display > Colour model by attribute.
- Enter the information as shown, click Refresh, and then click Apply.
- Choose Block Model > Save.
- Choose Block Model > Close.
The block model is displayed.
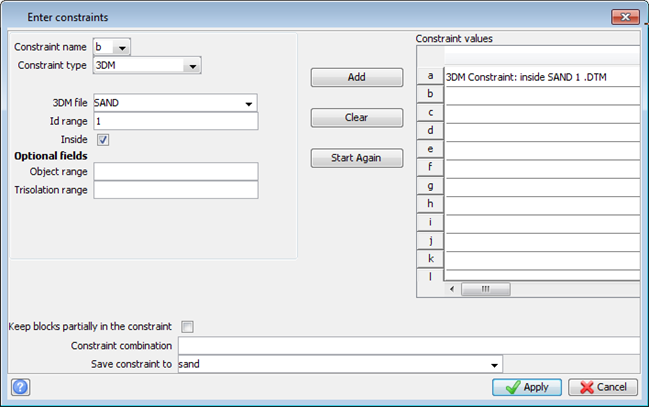
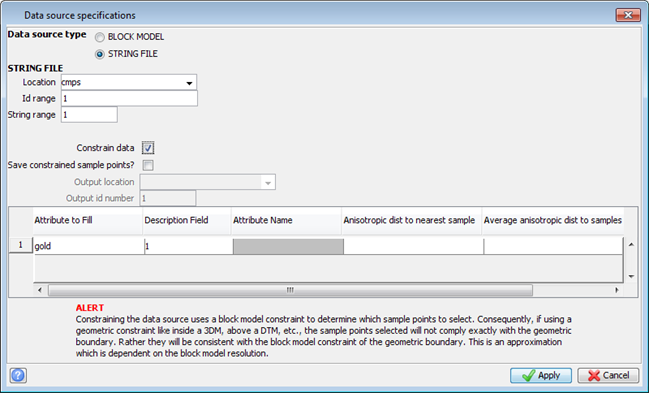
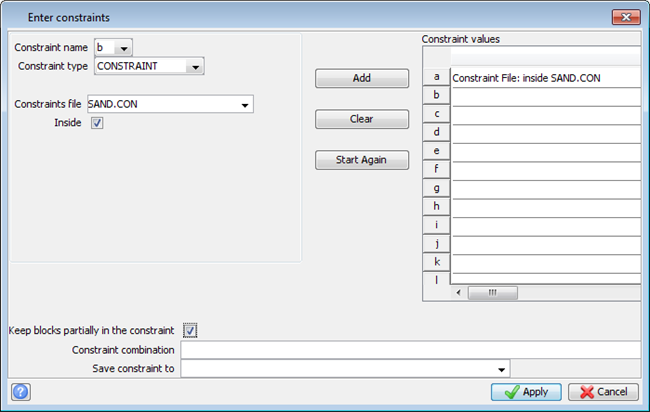
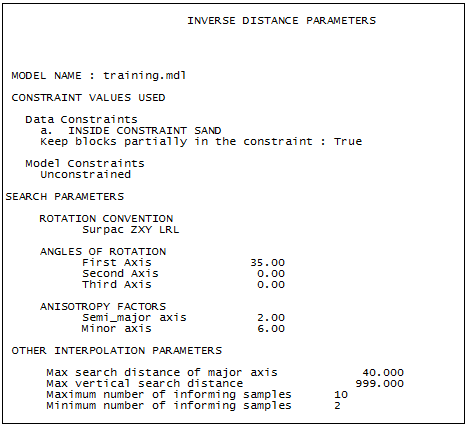
After the filling is complete, a report called training_id2.not is produced.
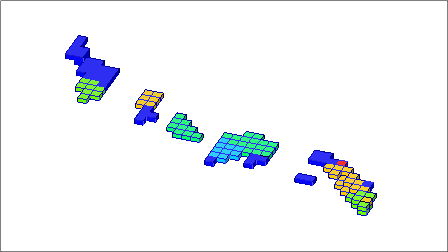
The constrained and coloured block model for the Sand1 zone is displayed.
Note: To see all of the steps performed in this task, run _05b_inverse_distance.tcl. You will need to click Apply on any forms presented.
Ordinary kriging
Task: Fill the QPY zone using ordinary kriging
- Open training2.mdl.
- Choose Block Model > Display.
- Enter the information as shown, and click Apply.
- Choose View > Data view options > View by bearing and dip.
- Enter the information as shown, and click Apply.
- Choose View > Zoom > Out.
- Choose Constraints > New graphical constraint.
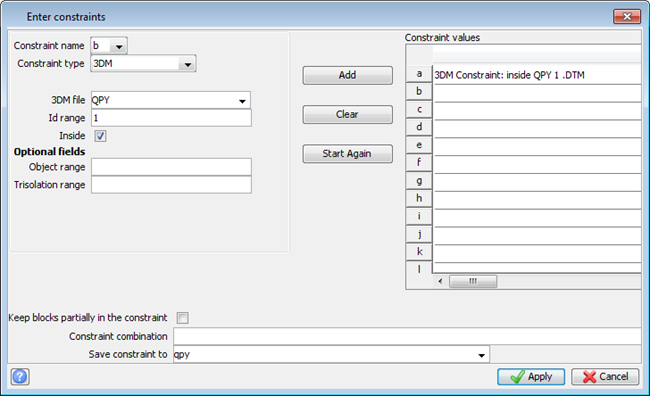
- Enter the information as shown, and click Apply.
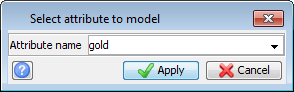
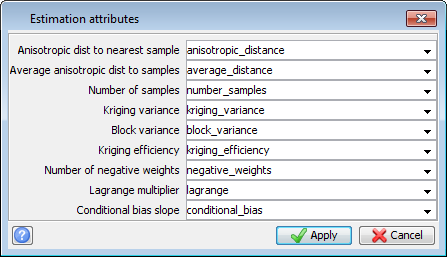
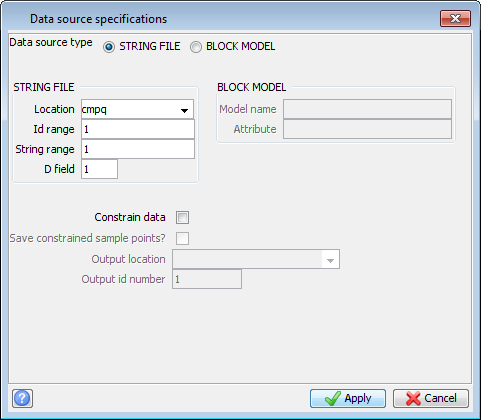
- Choose Estimation > Ordinary Kriging.
- Enter the information as shown, and click Apply.
- Enter the information as shown, and click Apply.
- Enter the information as shown, and click Apply.
- Enter the information as shown, and click Apply.
- Enter the information as shown, and click Apply.
- Enter the information as shown, and click Apply.
- Choose Display > Colour model by attribute.
- Enter the information as shown, click Refresh, and click Apply.
- Choose Block Model > Save.
- Choose Block Model > Close.
The block model is displayed.
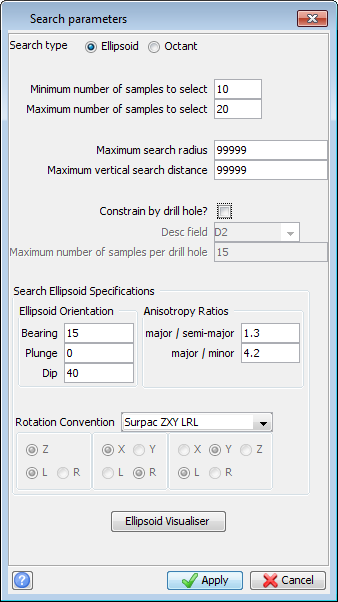
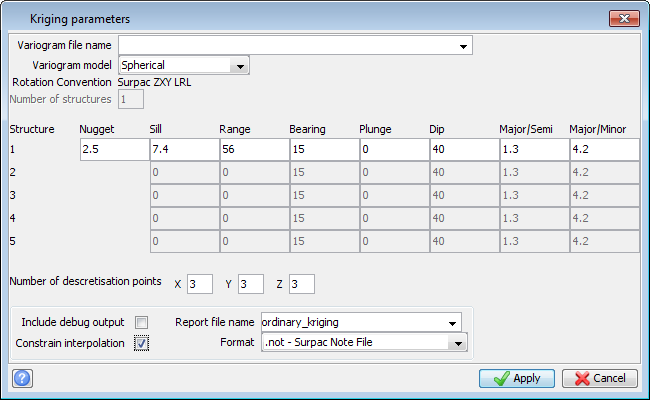
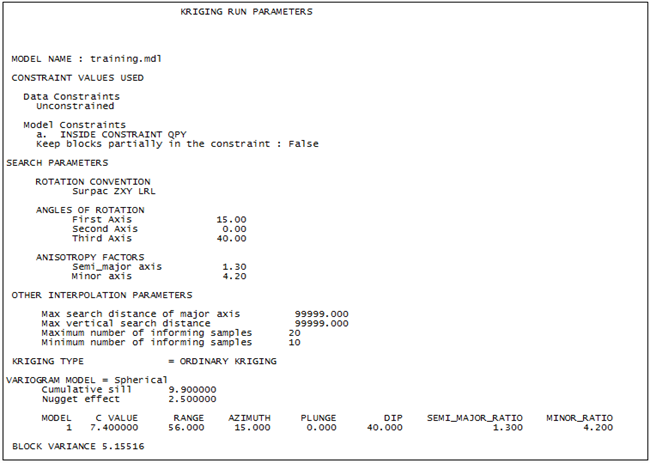
After the model is filled, a report file callled ordinary_kriging.not is produced.
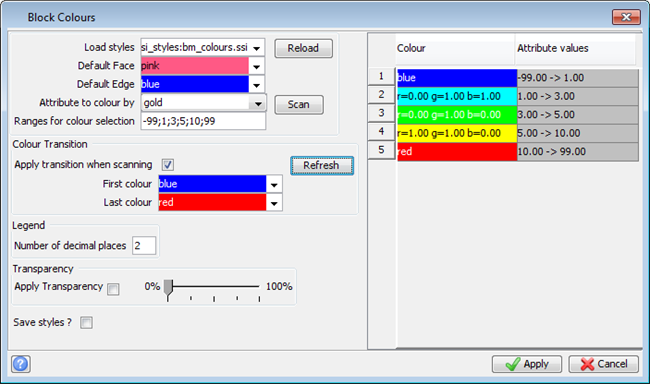
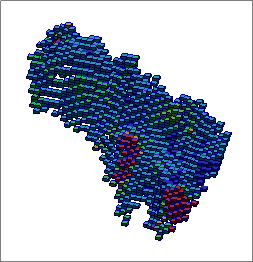
The constrained and coloured block model for the QPY zone is displayed.
Note: To see all of the steps performed in this task, run _05c_ordinary_kriging.tcl. You need to click Apply on any forms presented.