


Constraints within a block model
Applying constraints to a block model
Constraints are logical combinations of spatial operators and objects. You can use constraints to control the selection of blocks from which you will retrieve information and make interpolations.
It is possible to apply both simple and complex constraints to the block model to:
- fill the block model with values
- produce reports
- view models in Graphics
- load a constrained portion of a model
The spatial operators are:
- ABOVE
- INSIDE
- >
- <
- =
The operator you use depends on the nature of the object. The word NOT implies the opposite of an operation. For example, OUTSIDE is represented by the expression NOT INSIDE. When you use the AND statement, all conditions must be met for the constraint to apply to a block. When you use the OR statement, only one of the conditions must be satisfied.
Create a constraint file
This function allows you to generate constraints without having to perform any other block model function. When you learn how to use constraints, you can work effectively with the Surpac block model.
You can apply one constraint at a time to a model, or combine a series of constraints, and save them as a constraint (*.con) file.
The types of constraints supported are:
- inside/outside a solid
- above/below a surface
- satisfy the conditions of a block attribute
- inside/outside a string
- above/below a defined plane
After each constraint is defined, you must click Add .
.
 Note: If a constraint combination is not defined, Surpac will assume the AND statement applies to all constraints. That is, a AND b must be satisfied.
 Caution: The constraint file records the results of running a constraint. When you open the .con file, the same blocks will pass the constraint every time, even if their attribute values have changed. No additional blocks will pass the constraint. The .con file is effectively a static list of blocks that passed the constraint at a specific date and time.
Task: Apply constraints to a block model
- Open training2.mdl.
- Choose Block model > Display.
- Enter the information as shown, and click Apply.
- Choose Constraints > New constraint file.
- Enter the two constraints as shown, and click Apply.
- Drag and drop oxide.con into Graphics.
- Choose Constraints > Remove all graphical constraints.
- Choose Constraints > New constraint file.
- Enter the information as shown, and click Apply.
- Drag and drop trans.con into Graphics.
- Choose Constraints > Remove last graphical constraint.
- Choose Constraints > New constraint file.
- Enter the information as shown, and click Apply.
- Open fresh.con in Graphics.
- Choose Block model > Close.
Alternatively, click the training2 button on the Status bar, and choose Display.
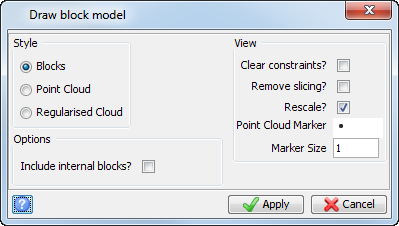
The entire block model is shown with no constraints.
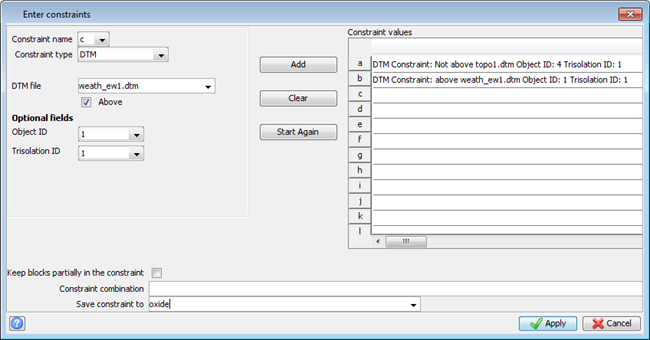
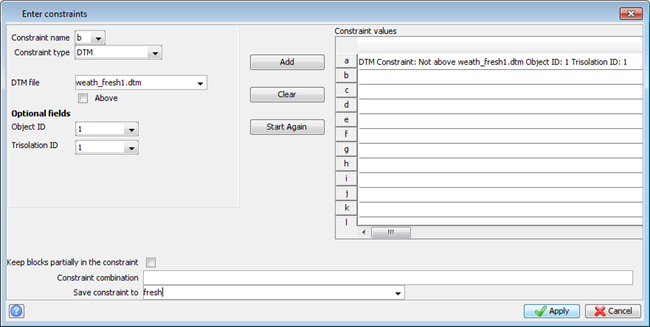
Note: After you have entered the constraint, you save it by filling in the Save constraint to box, and clicking Apply.
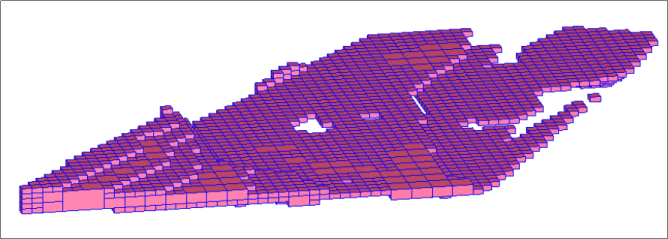
The blocks below the topography, and above the weathering layer, are displayed in Graphics.
You will now repeat the previous process to create constraints for the transitional zone and fresh rock zone.
trans.con is above weath_fresh1.dtm and below weath_ew1.dtm.
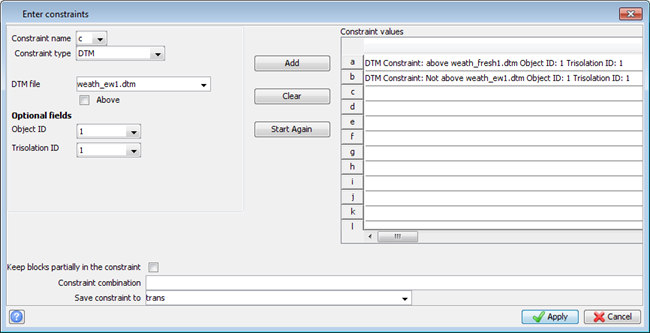
The blocks in the transitional zone are displayed as shown.
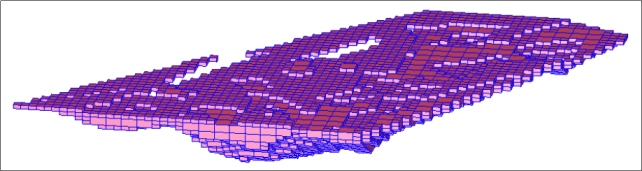
fresh.con is below weath_fresh1.dtm.
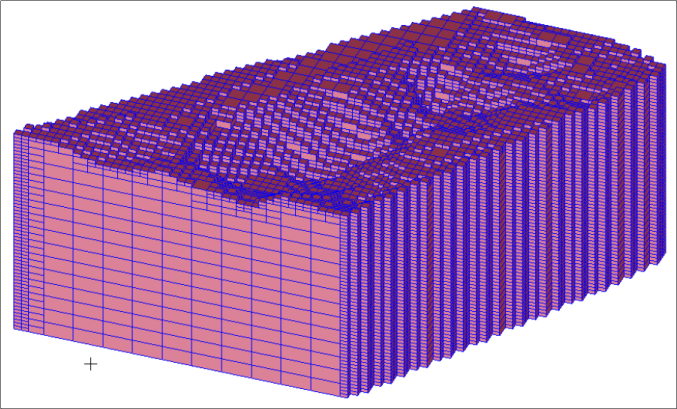
The fresh rock layer is displayed as shown:
Note: To see all of the steps performed in this task, run _03_applying_constaints.tcl. You need to click Apply on any forms presented.