


Block model reporting
Block model report
Task: Create a block model report
You will now produce a report for the entire deposit.
- Connect to training2.mdl.
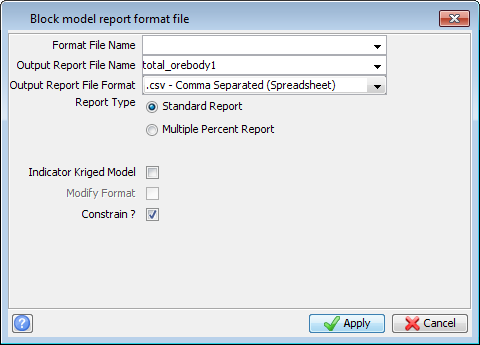
- Choose Block model > Report.
- Enter the information as shown, and click Apply.
- Enter the information as shown, and click Apply.
- Enter the information as shown, and click Apply.
- Open total_orebody1.csv.
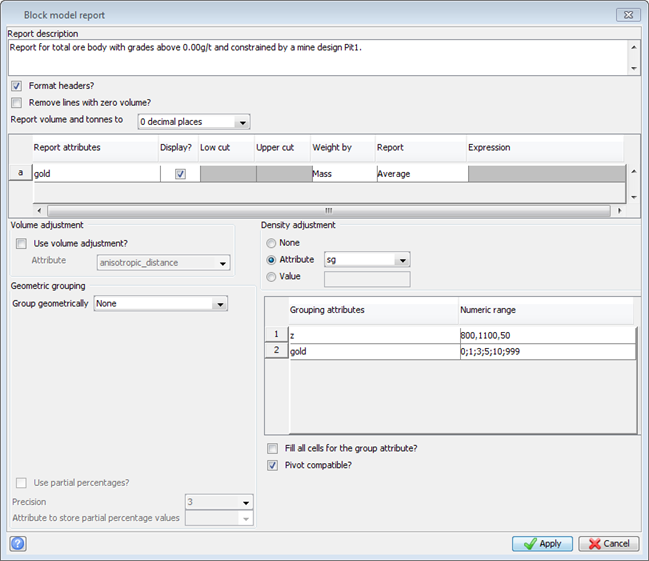
 Note: The report can be weighted by mass and, in this case, the specific gravity attribute must be supplied.
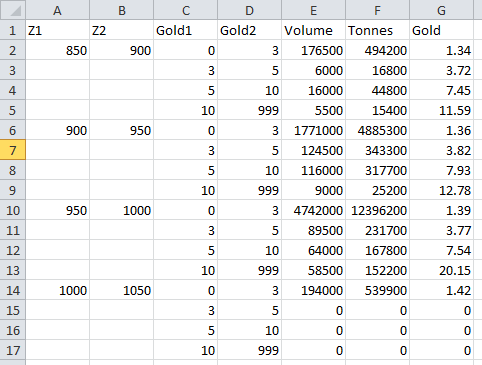
Grouping Attributes: You can group the results based on any attribute or Y, X, Z. If you are grouping by more than one attribute, the order in which they are specified will have a influence on the format of the report. In the above example , if the attribute GOLD is reported based on the cutoff values of 0;1;3;5;10;999 and these cutoffs are to be reported on each 50m elevation range between 800 and 1100, you would enter the Z value first, and the GOLD values second. The results will be divided into 50m elevation ranges within which the numbers are split into grade ranges.
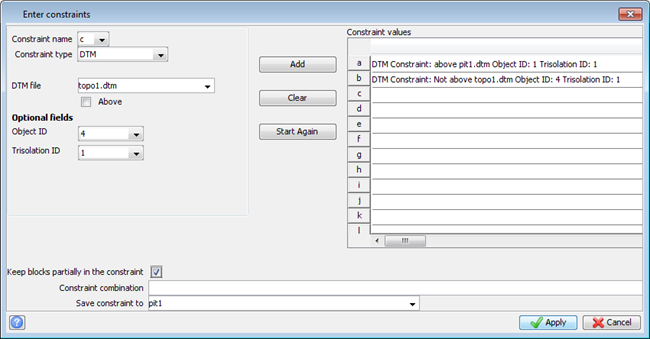
This will constrain the report to the material within the pit and below the topography.
The report is displayed in Microsoft Excel.
Note: To see all of the steps performed in this task, run _06_block_model_reporting.tcl. You need to click Apply on any forms presented.