


Create/Merge Language Translations
This frame is designed to allow the Source Code Administrator to perform given tasks on the master database. These tasks include:
- Creating a new Translation file
- Adding a new language to the Master Translation Database
- Merging with the Master Database
- Exporting the Master Database
- Merging with a Surpac Installation
The Create/Merge Language Translations panel in Master mode:
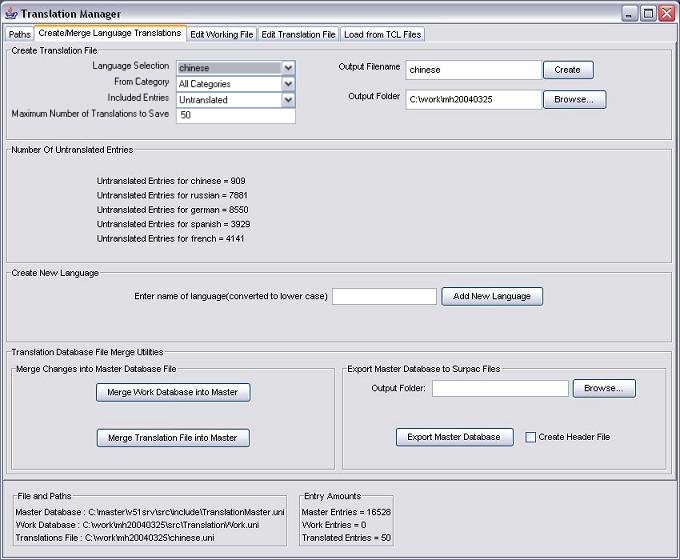
Creating a new Translation file
This area allows you to create a Translation file, which can then be sent to translators to actually perform the translation. It will only output text that has not been previously translated.
To create a translation file :
Master Mode

- Select the correct language from the pull down language selection box
- Enter the number of translations required (default is 50). You can specify as many as you like. If a particular category does not contain enough messages to satisfy this number, then the output file will only contain the number in that category.
- Select a category. All messages have an associated category, which can be used to specify where the translation of messages should come from. For example, you could specify "Menu text" as the category to begin the process of translating the menus.
- Enter the name of the translations file. Do not put an extension on this file name as the extension (.uni) will be added automatically. You can specify a full path if you wish. (default is the language name)
- Click on the "Create" button
This will create a language file, ready to be simply emailed or otherwise sent to a translator. Using a good naming convention for your file names will ensure that no confusion arises when sending these files.
Translator Mode

New language files can also be created in Translator Mode, although with less options, by taking data from the message files of an existing Surpac installation instead of the master database.
If the Surpac installation path is set, the user is able to choose from a list of languages taken from the Surpac files, and export all untranslated messages in that language to a new translation file as in Master mode.
Adding a new language to the Master Translation Database

Creating a new language in the Master Database is a simple matter of entering the name of the language in the text area, and pressing the "Add New Language" button. This will create a new language in the master database. You will have to close the software and restart it (or use the buttons above to reload the Master database) before these changes will be noticeable.
The language name you enter will be automatically converted to lower case.
Please be aware that this change affects the master translation database directly, it does not add the change to a work file first. Please make sure that you want to modify the master database, and that you have the name right before you press the "Add New Language" button.
Merging with the Master Database
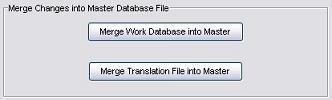
The two buttons here allow you to merge completed Work or Translation files into the master database. You must have the correct files loaded in the editor before pressing either of these buttons. If you don't have the correct files loaded, use the above buttons to load the files.
To perform the merge, simply press the appropriate button, and the merge will happen automatically.
The merge process will always assume that anything in the work file (or translation file) superceeds anything in the master file. If a text key already exists in the master file, then the old text for that key will be replaced by the new text in the work file. Work files also have the ability to add new text, and delete old text from the master file.
Work Mode
In work mode, only the Merge Work Database into Master button is visible, since there is no translation file loaded.
Exporting the Master Database
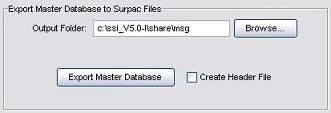
In Master mode, the user can export all entries in the currently loaded master database to message files in the format used by Surpac. This function may be deemed useful by the user for verification of the success of a merge by viewing changes within an existing Surpac installation, or to replace message files that have been damaged somehow. To export messages, browse for an output folder or type the path into the field provided, and click the 'Export Master Database' button. If you check the 'Create Header File' option, a header file for use when compiling Surpac will be written to the same output folder.
Since great damage can be done by tampering with the message files, a backup of any existing message files is made the first time a change is made in a given folder. If these are required to reverse a mistake, they can be found in
[Surpac Installation Dir]/share/msg/backup
Extreme caution should be still be used when modifying Surpac files.
Merging with a Surpac Installation
A special merge function is provided in Translation mode to allow the user to merge the changes in a translation file into the messages of an existing Surpac installation. If there is a valid Surpac installation path set, the QA panel will be enabled and will contain this button:

Clicking this button will commit the changes in the currently loaded translation file into the message files of the indicated Surpac installation.
This function, along with the Translator mode Create Language File is included to allow users to create and test their own translations in Surpac, using their own Surpac installation rather than the master translation database.
Since great damage can be done by tampering with the message files, a backup of the original files is made the first time a change is made to the installation. If these are required to reverse a mistake, they can be found in
[Surpac Installation Dir]/share/msg/backup
Extreme caution should be still be used when modifying Surpac files. Back to top of page