String morphing
This function creates new segments equally spaced between two existing segments which are selected in graphics. The selected segments must be consistent in direction.
String morphing can greatly improve the nature of solid models by ensuring a smoother transition between structures on adjacent segments, and can greatly reduce the staircasing effect when solid modelling. Morphing additional intervening segments often enables the solid modelling of otherwise difficult segments.
To run this function: Choose Solids > Triangulate > String morphing, or...
String morphing form
Number of new segments
Enter the number of new segments to be positioned evenly between the two master segments. A value of 0 means that no new segments will be created, but new points will be added to the master segments.
New string number
Enter the string number for the new segments.
Preserve master segments?
Check this box if the master segments should be preserved. Unchecking the box will cause the master segments to have new points inserted which would invalidate the triangles that are attached to those segments.
You may have to triangulate the segments again, either by checking the box in the form for automatic triangulation of the segments or by manually selecting the segments and triangulating them.
Remove duplicates?
The morphing process can introduce duplicate points. Check this box if you wish to remove duplicates.
Trap distance for removing duplicates
Enter the trap distance for removing duplicates.
Remove control strings?
Uncheck this box if you wish to keep the control strings once morphing is complete.
Triangulate segments?
Check this box to triangulate the segments automatically once morphing is complete.
Object ID
Define the object number for triangulating the segments created by the morphing process.
Trisolation ID
Define the trisolation number for triangulating the segments created by the morphing process.
Complete the String morphing form to display the prompts:
Select control point1
Select a point on the first segment.
Select control point2
Select a point on the second segment.
Selecting the control points will display the following prompts
Select 1st point of control pair1 - Press the Escape key.
Select the control point on the first segment.
Select 2nd point of control pair1 - Press the Escape key
Select the control point on the second segment.
The control strings are displayed in the graphics window.
The control points should be always selected in pairs. After completing the control point selection, press the Escape key to display an acceptance form.
Accept
Press this button to accept the control strings.
Digitise
Press this button if you wish to select a few more control strings.
Restart
Press this button to go back and restart the control string selection again.
Cancel
Press this button to cancel the morphing function.
While selecting the control strings, if the current control string overlaps with a previous control string, then the following warning message is displayed
SSI Warning: The control string overlaps with a previous control string, reselect both points
Even after reselecting the control strings, if the control strings still overlap, the String directions form is displayed
Re-select current control string
Select this option to reselect the control strings.
Cancel morphing
Select this option to cancel the morphing function. The control strings may overlap when the selected segments have different directions. You need to change the directions and start the process again.
After completing and accepting the selections, the specified number of equally spaced segments are created between the selected strings.
If you had checked the option for triangulating the segments in the user input form then these segments are automatically triangulated.
Result
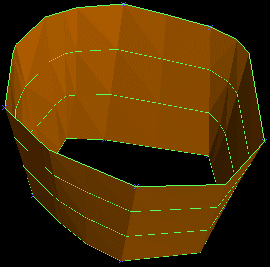
New additional segments are interpolated between a pair of strings, and these segments are then triangulated and displayed in the graphics window.
The string file containing a pair of strings before morphing.
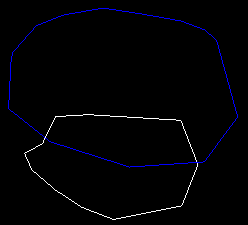
The resultant string file after morphing.